Dusting off old tech: Setting a daily unattended FM recording

Listeners may have a need for daily recordings of certain desirable FM broadcasts such as music programmes or sporting event calls. The use of online streaming to time shift broadcasts may offer an easy solution, but problems still exist:

  • Potential loss of audio quality, due to artifacts (audio distortion) associated with low bitrate streams
  • Anxiety over burning through the monthly internet data allowance, or the
  • Ever-increasing prevalence of ‘geoblocking’ due to music licensing restrictions.

Perhaps the radio recording app doesn’t permit recording of distant FM stations on the smart phone?

Radio Concierto "Concierto Enfoque" © 2005 Leo Prieto

Radio Concierto “Concierto Enfoque” © 2005 Leo Prieto

Enthusiasts who pursue long distance FM reception may need to monitor a specific vacant frequency every day to check the presence of signals propagated via Sporadic E or tropospheric ducting, especially during summer. This technique is often referred to as recording DX audio.

The ultimate solution to their specialist needs is to purchase a Software Defined Radio (SDR). An SDR probably represents the most efficient way to participate in long distance FM reception, without the often exhausting and time consuming burden of ‘live listening’ when propagation conditions happen to be favourable.

But many FM enthusiasts cannot justify the outlay of approximately $1,400 on a Micro Telecom Perseus Software Defined Receiver (SDR) with an FMplus down converter. And when one takes into account the minimum hardware requirements, their fellow Italian counterparts including the Elad FDM-S1/PDC-FM combination or FDM-S2 are not much cheaper either.

Recording FM broadcasts… on the smell of an oily rag!

By using simple but effective old technology, setting a daily unattended FM recording remains easily within reach for everybody.

There are likely to be numerous ways of achieving this, using an old computer. To implement this blogger’s preferred method, the following equipment is required:

  • Microsoft Windows XP operating system (or above)
  • Leadtek Winfast TV2000XP FM tuner card (or equivalent)
  • Rooftop FM/VHF/UHF antenna connection with ferrite chokes clipped onto cables.

The following equipment (as used in the final step) is desirable:

  • Desktop computer with a Bios that supports Auto Switch On.

The Leadtek Winfast TV2000XP is a sensitive FM tuner card which is readily available for $5 – $15 on the second hand market. The card has software available for Windows 7, Vista, XP and 2000. For simplicity, XP will be used in this guide since the TV2000XP software was optimized for this operating system.

Flexibility

Although the three mandatory steps below might initially look daunting, the beauty of this technique is that performing these steps is generally only required once. Furthermore, the technique is not restricted to unattended software recording tasks. To fully automate another task (such as a virus & malware scan) replace this task into steps one and two.

Old desktop computers © 2009 Brian Landis

Old desktop computers © 2009 Brian Landis

Virtually any old desktop PC (manufactured after 2002) should be a candidate for such ‘old school’ simplicity. It’s perhaps an opportune time to dust off disused Windows XP computers which may not be cost effectively upgraded to Windows 8 operating system after Microsoft’s cessation of support.

FIRST STEP – Setup Winfast FM in Windows Startup

A
Click on START
Search hard drive for WFFM.exe
Note which directory this application file resides in, for example: E:\Program Files\WinFast

B
Click on START
Search hard drive for Startup
In the list of results, there will be Startup next to a folder named something like:
E:\Documents and Settings\joebloggs\Start Menu\Programs
Click on Startup and leave window open.

C
Click on START
Click on RUN
Type in E:\Program Files\WinFast (or whatever directory it is, obtained from step A)
Locate WFFM.exe
Right click CREATE SHORTCUT
Drag the newly created shortcut into the Startup folder left open from step B.

Restart the computer. Please ensure Winfast FM starts up automatically.

Hint: Tuber Guru Fuel has made a video if the author’s approach (above) looks too boring to even contemplate!

SECOND STEP – Setup the timer in Winfast FM

The desired channel, number of hours and recording quality must be chosen in this step. Specific days may be chosen. For example, every Monday between 7-10 pm, Monday night football may be recorded.

WinFast Daily Recording Schedule © 2014 FM DXing

WinFast Daily Recording Schedule © 2014 FM DXing

Obviously, please ensure that the chosen frequencies (radio stations or vacant channels) to be recorded have been added in. To do this, click on CONFIGURATION button in Winfast FM and navigate to the CHANNEL LIST on the top centre.

Ensure antenna is connected and enter the schedule as follows:

Click on CONFIGURATION button in Winfast FM
Click on SCHEDULE button on the top right

Click on ADD at the bottom left
Under ACTION select RADIO RECORD
Under CHANNEL pick the frequency
Under FORMAT choose a PCM or a compressed format if disk space is tight

Under DAILY tick the applicable days
Under FROM select the Start Time
Under TO select the End Time

Double check details and select OK. Please take note of End Time and Start Time chosen.

WinFast Daily Recording Schedule © 2014 FM DXing

WinFast Daily Recording Schedule © 2014 FM DXing

For additional information on setting an FM recording schedule please click on the ? button within the software.

Ideally run a test scheduled recording consisting of a few minutes duration. Once complete, please check the contents of the recorded file to ensure it contains the desired broadcast.

THIRD STEP – Setup shutdown in Windows Scheduled Tasks

The aim is to ensure the computer switches off after recording. Blogger the Spinning Donut has a step-by-step guide and video for guidance.

Windows Daily Shutdown Schedule © 2014 FM DXing

Windows Daily Shutdown Schedule © 2014 FM DXing

Ideally run a test scheduled shutdown for a few minutes into the future. Once the system is shut off, please restart it.

When setting the time for daily shutdown, please use the End Time specified in step two, but add an additional 5 minutes. For example, if the End Time of the radio recording in Winfast FM Schedule is 11:30 please ensure the Windows shutdown is set for 11:35.

This allowance will ensure that the end of the recording is written to the hard drive, meaning that a valid sound file will consequently be playable with all audio software.

Hint: Third party software that will schedule a daily Windows shut down may be used as an alternative.

FOURTH STEP – Setup daily startup in BIOS 

The aim is to ensure the computer switches on before recording, an optional but desirable process.

A PC World Wiki contains a step-by-step guide to Wake System settings with screen shots.

When performing this final (and the simplest) step, please take note of the Time and Date configured in the Bios. Ensure that the WAKE UP TIME / RTC ALARM TIME selected in the Bios is before the Start Time chosen in Step two. For example, if one sets the system to wake 10 minutes prior to the recording Start Time set in the FM recording scheduler, this ‘factors-in’ the starting up delay of Windows.

These screen shots show the settings to configure the computer to wake at 0730 hours every morning. Each Bios may be slightly different, if in doubt please refer to the printed instructions supplied with the motherboard.

BIOS Daily Wakeup Schedule © 2014 FM DXing

BIOS Daily Wakeup Schedule © 2014 FM DXing

If Daily is not listed in the Bios facility, ensure the WAKE UP DATE / RTC ALARM DATE is to be set to 0 for daily system wakes. Whilst it is very simple, as always a trial run is recommended to ensure familiarity with the date and time format. Finally, don’t forget to save WAKE SYSTEM / RTC ALARM settings to CMOS when exiting the Bios facility! With this Bios, F10 does the trick.

BIOS Daily Wakeup Schedule © 2014 FM DXing

BIOS Daily Wakeup Schedule © 2014 FM DXing

Hint: Obviously when there is no longer any ongoing requirement to automatically start the PC for daily recording etc. it may be convenient to DISABLE the above WAKE SYSTEM / RTC ALARM settings!

Practical considerations

Some computer Bios facilities may not offer a Wake or Alarm System setting where the computer will switch on without intervention, as described in step four. Nonetheless, under those circumstances one can still follow the instructions to schedule recordings to commence and then shutdown, as listed in steps one to three above. Of course, one must be home to physically start the computer or already be using the computer for other tasks. For this reason, the provision for WAKE SYSTEM FROM S5 or similar Auto On facility in the Bios is considered a prerequisite for implementing a fully unattended recording system as proposed in this guide.

Windows Password & Login Settings © 2014 FM DXing

Windows Password & Login Settings © 2014 FM DXing

Step four will not work if the User Accounts in Windows XP (above) are set to require users to enter passwords & / or press Control-Alt-Delete as a security measure on Windows startup to operate software. These logins require user intervention, which is incompatible with the goal of unattended recording. These Windows logins are easily disabled (reference video). Moreover, password protected logins are overkill for old desktop computers that are not connected to the internet, but dedicated to the task of recording!

Alternative Power Management features such as reduced power Hiberation or Standy By modes are beyond the scope of this guide. The method above allows for maximum power saving. Since the computer system is only operational when required, there is also no potentially annoying fan and hard drive mechanism noise; older desktops can indeed be noisy.

Once it has been established that settings are configured properly during a test run, daily recording settings can be implemented. Enjoy the automation and the maintenance of old tech!

Testing: the method has been tested numerous times with several disused single-core CPU (3 GHz) computers using ASRock K7VT6 & Asus P5GZ-MX motherboards. These of course, feature a Bios that supports Auto Switch On. 

Dusting off your collection: the legacy of INXS

During February, even the most uncommitted INXS fans ‘came out of the woodwork’ to celebrate this Australian band’s music. Many of this blogger’s peers are dusting off the memories and reflecting on the musical journey that shaped the albums.

This blogger was a fan of INXS until the early 1990s. The first album that was purchased was Kick on cassette. Frankly, everybody owned this album! A failed search for this blogger’s rarely-played copy was conducted during the INXS frenzy that accompanied the free to air television mini series. At some point over the years, someone has probably stolen it from the cabinet. This is not unusual occurrence, it’s a fate also suffered by the Don’t Change 7-inch!

INXS Kick © 2007 przybysz

In the 1990s, vintage albums would be played in entirety and commercial-free, late at night on the local commercial FM radio station. One night, Shabooh Shoobah from 1982 was played. That broadcast was taped on a cheap TDK D120 and the album was one of the band’s most interesting. It’s strikingly different to the late 1990s INXS sound.

INXS Shabooh Shoobah © 2010 epicletic

Of the albums in this blogger’s collection (below), X from 1990 may be the most underrated. Lesser known album tracks such as The Stairs hold up well to this day. Unfortunately, the album leads with the catchy single Suicide Blonde which might be the artistic equivalent of Blur’s Song 2! (Sorry if this opinion disappoints fans of this song! Each to their own).

Both Kick and X were remarkably consistent albums and it was predominantly through these releases that people such as this blogger became fans. Nonetheless, in the process of trimming the perhaps indulgent B-sides that frequently peppered earlier releases, did the unique and enigmatic edge to their music fade? A certain level of artistic obscurity seems to accompany musical credibility! For musicians, it must be extraordinarily difficult to remain both fashionable (‘cool’) and maintain popularity amongst fickle consumers.

By 1991, INXS probably realized they needed to experiment again. The miniseries suggests this was indeed the case. This yielded mixed results, as Stephen Thomas Erlewine explains succinctly at All Music Guide. Cue Regurgitator’s I Like Your Old Stuff Better Than Your New Stuff,  a track which highlights just how frustratingly fickle consumers can be.

Most of the collection © 2014 FM DXing

Should one invite people over… only a single INXS album ever consistently gets played by strangers, and that’s The Swing from 1985. Dancing on the Jetty is this blogger’s favourite track on the album, by a considerable margin. As most fans will know, that album yielded the US breakthrough with two singles

INXS The Swing (Remastered) © 2014 FM DXing

As has been widely reported in the mainstream Australian press, in the television miniseries there was scant attention directed towards Hutchence’s Max Q indie project, nor his earlier single Rooms For the Memory. That track appeared on a magnificent 1987 compilation from the Australian indie movie Dogs In Space which starred Hutchence. In this blogger’s opinion, even in 2014 this film remains thoroughly entertaining, capturing the essence of late 70’s suburban rock, not to forget the pitfalls of living in ‘share houses’!

Max Q autographed © 2011 Luna715

Max Q’s Way Of The World was certainly not a disposable single, but this blogger did buy the Max Q cassette album from a discount bin at Myer… which highlights just how commercially unsuccessful it was. Fortunately, the Max Q singles do still receive commercial radio airplay. Even the video of Sometimes was chosen on an edition of Rage last week by the Sunnyboys that was worth missing (much needed) sleep to watch!

Most of the collection, another angle © 2014 FM DXing

Critics will always be divided about the accuracy of any biographical production. Hutchence’s family might argue on commercial radio about whether the script was reflective enough of his individual musical genius. That alone seems somewhat odd, because it was an INXS (i.e. a collective) biography. One thing is for sure. Making a biographical miniseries has drawn old fans (like this writer) back to the music of INXS. Perhaps through the mainstream attention, the band’s work has even captured a skerrick of a newer audience? And that’s important.

Singles of INXS can be viewed at ARTISTdirect. The solo singles of Michael Hutchence, including the Max Q collaboration can be viewed on Youtube. Readers might also enjoy The Boss covering the classic INXS single Don’t Change last month, whilst performing in Sydney.

Revisiting the Realistic PRO-2006

Around 1990, Tandy Corporation introduced the Realistic PRO-2006 programmable scanner. It was manufactured for Tandy by General Research of Electronics, Inc. (GRE) in Japan. It is also known in Europe as the Commtel COM-205 or Handic 0080 (below), according to Javiation.

Handic 0080 aka PRO-2006 © 2011 Wanderlinse

This triple conversion receiver offers microprocessor-controlled VHF, UHF and FM reception. A rooftop antenna or whip (supplied) is connected via the BNC antenna connector. The scanner sold for a retail price of $400 in the United States.

Realistic PRO-2006 © 2014 FM DXing at WordPress

There are plenty of modifications that can be undertaken for this scanner. These include the ability to tap the discriminator output or the 455 kHz third Intermediate Frequency (IF) signal for SSB demodulation. An HF receiver or modern outboard conversion hardware (such as RadiØKit-2 in combination with open source Dream software) is required to demodulate the SSB from the IF signal.

Being relatively lightweight, the PRO-2006 offers genuine potential during field trips at summits. The scanner is easily operated using an inexpensive, lightweight and rechargeable Sealed Lead Acid (SLA) battery.  A battery with a capacity of nine Amp hours (Ah) is more than adequate for this scanner. A handheld MP3 recorder featuring line-in recording can be connected to Tape Output on the rear of the scanner to permit monophonic recording of reception, including FM broadcasts.

Realistic PRO-2006 supplied antenna © 2014 FM DXing at WordPress

FM broadcast band tuner module

The PRO-2006 incorporates two 280 kHz, two 455 kHz ceramic filters and a 48.5 MHz crystal filter. Wide FM mode is designed for analogue FM and TV audio only.

Realistic PRO-2006 tuner module, rear unit perspective © 2014 FM DXing at WordPress

The PRO-2006 has two 10.7 IF bandpass filters in the FM section (above). These are both marked 10.7A, suggesting a 280 kHz bandwidth. The part number is Murata SFE10.7MA5W-A. The bandwidth of these filters is too wide to discriminate FM stations spaced 100 kHz or 200 kHz apart on the contemporary congested FM band.

PRO-2006 partial schematic © 1990 Tandy Corporation

KA2243N (IC1)  is the IF amplifier/detector Integrated Circuit (IC). The first 280 kHz filter (CF1) leads directly to pin 1. The second 280 kHz filter (CF2) leads to pins 4 and 6. The HA12413 IC may be substituted for the KA2243N.

This tuner module incorporates the IF coils and the Quadrature/detector discriminator coil for both 48.5 MHz (T1, T2) and 10.7 MHz (T3, T4).

FM broadcast band performance

The nominal 30 decibel FM sensitivity ‘design specification’ for the PRO-2006 is 3 microvolts for frequencies from 25 – 520 MHz. The FM broadcast band falls into this segment.

Radios featuring a Si4734 digital AM/FM radio receiver IC, such as those manufactured by Tecsun, offer approximately equal sensitivity as the PRO-2006 scanner in Wide FM mode. It is impossible to make entirely accurate comparisons between the Silabs’ Digital Signal Processing (DSP) based receivers and conventional tuners, since the company use differing units and test conditions to measure sensitivity. However, the nominal 30 decibel FM sensitivity ‘design specification’ (below) from Tecsun, applicable for radios such as the PL-300WT & PL-606) is better than 3 microvolts for frequencies from 64 – 108MHz.

Tecsun specifications © 2014 FM DXing at WordPress

How to access the tuner module

Unscrew the two, top positioned screws on the rear of the scanner. Remove the top plastic cover top to expose the ‘linear printed circuit board’, PC1. Remove the metal cover of the tuner module (below), which is located second from the right.

PRO-2006 interior modules © 1990 Tandy Corporation

Replacing wide 280 kHz filters in the PRO-2006, PRO-2005, PRO-2004, PRO-2035 or PRO-2042 scanners is likely to be as simple as the modification to the Philips FM1216-based tuner module, used in television tuners such as the Winfast TV2000XP. An excellent resource for this modification is GBPPR Projects.

Realistic PRO-2006 frequency display © 2014 FM DXing at WordPress

Mating the PRO-2006 with a Software Defined Radio (SDR)

After filter replacement, tapping the 10.7 MHz IF (both mods are described at GBPPR Projects) may enable the 10.7 MHz output from the scanner to be manipulated with DSP functionality in an SDR. Unfortunately, readers wishing to do so are ‘on their own’ because the writer does not own a compatible SDR (such as the SDR-IQ). It may be instructive to watch the video Gough Lui made. He taps the 10.7 MHz IF of the PRO-2021 scanner into the Winradio Excalibur SDR. Peter employs the same principle in his video.

A more inexpensive alternative may be to use a High frequency (HF) upconverter in combination with a cheap RTL-SDR receiver. Such upconverters are available for under $50. Unlike the cheap RTL-SDR receiver itself, an upconverter will tune into the 10.7 MHz output frequency from the scanner. There are side effects in this approach, which potentially include a 10 decibel loss and the limiting dynamic range of the RTL-SDR receivers.

Pairing the scanner with an SDR offers hobbyists the opportunity to extract the maximum potential audio quality out of FM broadcasts or International Radio and Television Organisation (OIRT) broadcasts on 66-74 MHz still on-air in Eastern Europe.

Creative Commons license - Click here for details

PRO-2006 photographs may be freely used for non-commercial activity, provided attribution is given. Should readers choose to use those photos elsewhere, please link back to this page or attribute this blog as the copyright holder. Please click on the photos for higher resolution shots (2048 x 1536 pixels).

Eighties Retro Radio

Rewind time back to 1988 and an ‘el cheapo’ FM stereo tuner kit looked like this! The three modules pictured below consisted of an:

  • FM tuner (steel shielded front end),
  • Intermediate Frequency/detector (IF) &
  • FM stereo decoder.

The three modules connect together with 28 inexpensive supporting components to comprise a fully functioning FM/AM tuner with a basic signal strength meter, LED stereo indicator & coaxial cable antenna input.

Tuner module © 2014 FM DXing at WordPress

Module for IF & Detector © 2014 FM DXing at WordPress

Module for Stereo Decoder © 2014 FM DXing at WordPress

The tuner featured analogue tuning with switchable Automatic Frequency Control (AFC) feature. AFC is rarely mentioned these days. In a nutshell, AFC circuitry automatically locks to the tuned frequency so as to facilitate ‘drift free’ reception of the desired FM broadcast; automatic correction is applied when the dial is ‘off-tuned’. In a congested FM band, the function is best switched off, otherwise that weak signal might be hard to find.

Contents of Electronics Australia magazine © 1988 Federal PublishingCover of Electronics Australia magazine © 1988 Federal Publishing

The above tuner was featured as a Do It Yourself (DIY) kit in the now defunct Electronics Australia magazine (above) from April 1988. Hand written & printed schematic diagrams and modules (above) were found in buried in an old set of drawers.

The schematics for each module appear below:

FM tuner schematic © 2014 FM DXing at WordPress

FM IF & detector schematic © 2014 FM DXing at WordPress

Stereo decoder schematic © 2014 FM DXing at WordPress

Further reading

1974 MPX-stereo decoder with TCA290A

TCA420a datasheet

AFC Definition

AFC Explained

What is AFC?

Why choose plain FM over FM AFC?

FM USB Tuner Shootout: PC Ear vs Instant Radio (ADS Tech RDX-155)

Welcome to another radio shootout, Boxing Kangaroo edition! These shootouts feature ‘dirt cheap’ radios and are intended to appeal to a variety of different potential audiences, including terrestrial FM radio listeners and hobbyists interested in elementary electronics or FM reception capabilities.

Boxing Kangaroos in the zoo © 2011 Scott Calleja

Digital Signal Processing on the cheap?

At the time of writing, the cheapest Chinese portable FM radio currently available incorporating Silicon Labs’ (Silabs) Digital Signal Processing (DSP) costs about $49 including delivery. This model is the Tecsun PL-606. For those with a laptop and access to a directional antenna, USB computer devices with the SI4700/01 integrated circuit (IC) are considerably more inexpensive, representing a cheap entry to Silabs DSP.

 Tecsun CR-1100 © 2013 James Case

 Tecsun PR-380 © 2013 James Case

The contenders: Two popular Silabs USB FM tuner

Instant FM Radio (Instant Radio) costs about $17 including delivery.

USB FM Radio Player © 2005 Silicon Laboratories

MP3car.com ADS Tech RDX-155 Instant Radio under Windows 7, Canberra Australia

Geeks.com ADS Tech RDX-155 Instant Radio marketing photographs

PC Ear FM Radio Player © 2014 FM DXing

PC Ear costs about $17 wholesale but is no longer readily available new.

PC Ear unboxed © 2014 FM DXing

Gunning for the best: PC Ear versus Instant Radio

A rudimentary inspection of the datasheets suggest the FM sensitivity measurements are equivalent for the Silabs ICs inside PC Ear and Instant Radio. To test this, a modest directional antenna was connected to the devices. Both devices were housed in a metal enclosure with two suppression chokes and operated with a Radio Frequency (RF) quiet laptop running from battery power.

Reception conditions were well below average with heavy, unrelenting rain. 15 stations were chosen for the test. Of these, 13 stations were detected with the minimum signal strength of 0, where signals are just audible above the noise floor. Because of the heavy rain, two of the usual weak signals were not audible during the test and accordingly, do not appear in the performance table.

Software

PC Ear does NOT support firmware upgrades using the Windows-based Silabs configuration software utility. Firmware updates to PC Ear can be done under Ubuntu/Linux, but the process may be complicated. The Silabs Radio DLL software appears to function, but audio issues were evident when tested briefly with PC Ear. According to the developers, it is supported.

The upgraded firmware was used with Instant Radio. The upgrade was performed per the ADS Configuration user guide instructions for Silabs Radio DLL, developed by Beezer, Guino and Pete.

Characteristic PC EAR  INSTANT RADIO
Tunable frequency range 76 – 90 MHz, 87.5 – 108 MHz 76 – 90 MHz, 87.5 – 108 MHz
Circuit board approximate size 1.3 x 0.6 inches 2.4 x 1.1 inches
Tuning steps 50 kHz 50 kHz
Radio Data System support No Yes
Software support USB Radio 2.0-3.0 (supplied), FM Signal Strength Analyzer 1.0.0.19, Silabs Radio DLL, Silabs configuration software utility. Instant Radio 1.0.0.11 (supplied), Silabs Radio DLL, FM Signal Strength Analyzer 1.0.0.19, Silabs configuration software utility.
Hardware version PC Ear 1.77 Silabs 1.7.15
Firmware upgradable No, Please refer to body of article Yes, ADS NoiseMod Primary.dec

The software support listed in the characteristics table (above) is NOT exhaustive. Please understand that the priority was to test reception performance.

Any frequency (or broadcast) can be easily recorded for hours ‘on schedule’ using third party Windows audio recording schedule software such as Fox Magic Audio Recorder (free) and High Criteria Total Recorder Professional ($36). The software supplied with the devices also offers recording ‘on demand’. ADS Tech Instant Radio software is especially recommended for this purpose, since it offers high resolution 96 kHz uncompressed recording capabilities.

Closeup of ADS Tech Instant FM Music PCB © 2014 FM DXing

Comparative performance

PC Ear is constructed on a double sided printed circuit board, whilst the Instant Radio device uses a much larger single sided board (above). Unsurprisingly, both designs feature surface mount components.

RADIO STATION FREQUENCY (MHz) PC EAR MAXIMUM SIGNAL STRENGTH (BARS) INSTANT RADIO MAXIMUM SIGNAL STRENGTH (NUMBER) INSTANT RADIO RDS DECODING DISTANCE (MILES)
90.5 0 3 No 43mi (200 W)
91.1 2 – Quieting Mono 19 – Quieting Mono Instant 35mi
92.1 0 6 N/A 43mi
93.7 0 0 N/A 62mi
94.9 0 6 No 27mi
95.3 1 6 N/A 88mi
98.5 1 – Quieting Mono 9 – Quieting Mono N/A 88mi
99.4 0 0 No 48mi (2 kW)
99.5 No signal, Slight high adjacent channel interference (99.7) 0 N/A 208mi
102.9 0 6 N/A 48mi
104.5 4 – Quieting Stereo 50 – Quieting Stereo Instant 11mi
105.7 0 5 No 48mi
107.7 5 – Quieting Stereo 57 – Quieting Stereo N/A 11mi

Instant Radio consistently offered a slight edge with superior adjacent channel suppression on one station and the advantage of RDS. PC Ear did ‘stutter’ occasionally on one RDS-enabled station. A change to the device settings (below) and immediately unplugging the device solved the problem. This trivial audio issue could not be replicated again after 15 minutes of listening to the station, nor the next day.

PC Ear FM Radio Player custom settings © 2014 FM DXing

There were no consistently observable differences in sensitivity, audio quality or immunity to internally-generated spurious noise (interference) between the devices. This result was somewhat unexpected because PC Ear is rumoured to be an earlier Silabs USB tuner prototype with its share of critics on the world wide web. Perhaps the critics use the supplied wire antenna (in both devices, 29 inches long) and therein lies the problem? But the test suggests PC Ear performs just as well as Instant Radio with a directional antenna. If anything, the test was biased against PC Ear because of expectations the device was of poor design quality relative to its sister models.

Performance improvements

It should be stressed that Instant Radio and other Silabs devices require antenna modifications (below) for connection to a directional antenna such as a rooftop television antenna. Soldering skills are recommended for permanence. The use of other alternatives to ‘mate’ the device with an external antenna, such as passive induction as used in some mobile broadband device antennas might also be feasible, but discussion is beyond the scope of this shootout.

With the additional expense of a metal enclosure, shielded five metre USB cable, pre amplifier and several ferrite suppressors, the total cost equates to approximately $135. Many readers may already own much of this equipment, but it does represent a potential outlay. In this blogger’s opinion it is only worth pursuing such a project for the sheer fun of experimentation!

Instant Radio customization © 2014 FM DXing

Notwithstanding the extra Do It Yourself (DIY) effort and cost required to extract the device’s DX potential, Silabs tuners feature satisfactory signal separation and strong signal handling. With the above modifications, Instant Radio is sensitive enough for daily signals from in excess of 265 miles. Momentary meteor pings from distant FM stations are possible to receive. Although untested at the time of writing, it is anticipated that modifications to PC Ear would accomplish the same. The bottom line is that these Silabs devices were designed for learning projects. It is NOT suggested to ‘throw good money after bad’.

Comparative performance with expensive stand alone tuners

As one should realistically expect because of the tiny footprint and price, the devices are outclassed by stand alone tuners with a proper shielded tuner module. Even with a preamplifier used in-line to desperately boost sensitivity, this is apparent. Head-to-head, the following tuners or SDRs (tested without preamplifiers, using the same antenna) all noticeably outperform Instant Radio (FM usable sensitivity* is listed in brackets):

  • Blaupunkt Casablanca CD51 (1.68 microvolts),
  • Elad FDM-S2,
  • Sherwood TX-5090 RDS (1.58 microvolts),
  • Yamaha TX-950 (0.8 microvolts).

For example, in a ‘dead-of-winter’ test, the Blaupunkt automotive receiver consistently achieved better performance than Instant Radio. Improved RDS sensitivity meant that the car radio decoded digital RDS data from two extra stations. Like all models in the Sharx range, the car radio more readily discriminated stations spaced 100 kHz apart.

Instant Radio was capable of receiving 2/3 of the 15 weak signals chosen for the test, whilst the car radio nabbed 93% of weak signals! The Silabs devices enable reception of the same stations from in excess of 265 miles as standalone tuners. However, this reception will obviously be more transient and weaker signals are unlikely to be audible. From a DX enthusiast’s perspective, that may be a frustrating prospect.

The number of RDS decodes achieved with Instant Radio was equivalent to the Bauhn ADS-215 dual band portable radio connected to a carefully aligned rabbit ears antenna mounted near a window. Invariably, Instant Radio outperformed the Bauhn portable radio using its inbuilt telescopic antenna.

DealeXtreme.com PC Ear marketing photographs

Summary

The device incorporating the Silicon Labs’ SI4701 IC (marketed as ‘Instant Radio’, above) is one breed of flash-drive sized computer tuner that offers modest potential for weak FM signals. It suits receiving locations with a congested FM band. Its full RDS capabilities can be exploited in locations where broadcasters support the system. PC Ear also offers similar performance, without RDS decoding.

All software tested works successfully on both receivers without noticeable bugs. There is a range of tuning software to choose from. Both Silabs devices are suited to DIY modifications.  Users of Instant Radio benefit from access to the latest firmware.

Further reading

Gadget tunes in to FM via USB

Instant Radio for distant FM reception

Instant Radio satirical shootout

Instant Radio slideshow

Radio recording saved the radio star

Silabs Radio DLL

* Standard DIN sensitivity specifications, tested with THD 3% & S/N of 26 dB. Official data, sourced from manufacturers. Lower numbers (approaching zero) indicate the best FM sensitivity. The Elad FDM-S2 sensitivity is measured differently from conventional tuners. This SDR offers better than 2 microvolts using the 12dB SINAD measurement on the extended FM band.

As always, the writer has no affiliation with any retail merchant or product manufacturer. This entry is NOT intended to be construed as an endorsement of any particular model. Prospective buyers should carefully make their own enquiries according to their particular needs and circumstances. 

Coolum’s hidden gem: Low’s Lookout

Low’s Lookout is a lookout and picnic shelter at the end of Grandview Drive at Coolum on Australia’s Sunshine Coast. Via road, the lookout is a one hour and 24 minute drive north of Brisbane’s Central Business District. Low’s Lookout is a 26 minute drive south of Noosa’s Hastings Street.

Coolum’s residential population was 7,175 in 2006, according to Queensland Places. The lookout is situated on the Point Arkwright (southern) side of Coolum. The name originates from Maroochy Shire chairman Edward (Ted) Low.

Grandview Drive leading to Low's Lookout © 2013 FM DXing at WordPress

History plaque at Low's Lookout © 2013 FM DXing at WordPress

The elevation is 73 metres above sea level (240 feet) but to the immediate south and south west there are blockages (NOT pictured) by Eurungunder hill, the Lutheran Youth camp at Luther Heights and surrounding ranges. Mount Coolum is only three kilometres (two miles) south and although it is only 207 m (679 ft) high, it is an exceedingly wide and prominent mountain.

The most obvious hill is pictured in the foreground of the photos. This is Emu Mountain (aka Mount Peregian) which is an easy half hour climb. Despite the modest 71 m (233 ft) elevation, a climb of Peregian provides spectacular views of the region.

Low's Lookout vista: Northerly aspect, including Emu Mtn © 2013 FM DXing at WordPress

The nearest mountains of merit include Mount Cooroy, Bottle & Glass and Eerwah (near old friend Point Glorious) which range in height from 388-409 m (1,273-1,342 ft). Whilst NOT apparent in the photos, these can be found about 18 km (11 mi) away in the quadrant from the west to northwest.

Picnic table at Low's Lookout, Northerly aspect © 2013 FM DXing at WordPress

Picnic table at Low's Lookout, Northerly aspect © 2013 FM DXing at WordPress

Early photographs of the lookout show how development has profoundly changed Coolum’s landscape in the last 50 years. In the 1980s and 1990s, Coolum was reportedly an exceptional location for MW (AM) reception. (The reason this blogger knows this is that after publication, a reader kindly shared his experiences at Coolum with beverage antennas. Thanks James!)

In contemporary times, Low’s Lookout is useful for FM radio reception to the north, although parking spaces are extremely limited. During an instance of coastal tropospheric ducting, the Mackay FM broadcasts were receivable from roughly the NNW (azimuth: 325°) at Low’s Lookout. This was heard at 8:30 pm on the evening of Monday, December 16 in the car:

Although the broadcast site is a distance of 743 km (462 mi) away, the Mackay 100 kilowatt broadcasts have been observed regularly at the Sunshine Coast by this blogger during December. The signals usually last for at least two hours and occasionally persist until dawn.

Perhaps on Queensland’s Sunshine Coast these conditions are a fortnightly (or weekly) occurrence during December, providing rooftop FM directional antennas can be used? Even quality, Australian-made fibreglass AM/FM monopoles (e.g. GME, Mobile One or ZCG Scalar) may suffice on the rooftop, providing a signal preamplifier is used.

The 50 watt public broadcasts from Miriam Vale (distance: 288 km/179 mi, azimuth: 329°) were also audible at Low’s Lookout. Miriam Vale is situated between Gladstone & Bundaberg. Although these distant tropospheric signals were NOT audible at beaches (that is, sea level), around sunset the reception of transient jet reflected signals can be readily exploited with virtually any contemporary automotive receiver. Opportunities abound!

Coolum Beach including Emu Mtn © 2013 FM DXing at WordPress

It must be emphasized that NOT all of the Sunshine Coast is ideally suited to tropo from the north; such generalizations are completely misleading! Mooloolaba and the northern regions up to Peregian Beach are preferable. Based on limited past experience, Caloundra & Bribie Island for example, seem to be located too far south on the coast; also the nearby Blackall Ranges (including Flaxton, Mapleton, Montville & Maleny) may block signals from the SW to the NNW. Multiple mountain ranges from Landsborough through to Eumundi (Point Glorious) are potential impediments. Reception in Noosa suffers from problematic terrain obstructions; it seems to be the most challenging region for FM/UHF reception from the north on the entire coast by a significant margin. There is good reason for all those translators!

Data was sourced from FM Scan, Google Maps, Hey What’s That & Where Is? The recording was undertaken with an Olin OVR-101 stereo voice recorder at 128 kbps MP3 resolution. An amplified, vertical, dual diversity automotive FM antenna system was used in this instance.

Creative Commons license - Click here for details

These photographs may be freely used for non-commercial activity provided attribution is given. Should readers choose to use those photos elsewhere, please link back to this page or attribute this blog as the copyright holder.

Returning to the scene of the Glorious crime!

Welcome to 2014 dear readers!

Back in December (sadly, yes it is January already) there was a return visit to Point Glorious undertaken for a hike on the dry dirt roads that were generously littered with horse excrement. This tower was spotted by a companion at the deserted lookout, whose eyesight is evidently better than this humble blogger.

Black Mtn broadcast site servicing Gympie, Cooroy © 2014 FM DXing at WordPress

The towers are situated nine kilometres (5.5 mi) away in a straight line, or 26 kilometres (16 mi) via the shortest vehicular route. This broadcast centre is sited off Eungella Drive at Black Mountain near Cooroy. Three 20 kilowatt FM public broadcasts originate from this site. In addition, five regional television affiliate stations are broadcasting on UHF from this site with power of five kilowatts. More photos, taken by photographer Tallowwood Place .net can be found on Panoramio.

Apart from precipitation that accompanies heavy-duty thunderstorms, rain has been rare in this region throughout December. Weather conditions have remained extremely dry (along with excruciating humidity) as is clearly evident in the photographs. Professionals expect this hot weather will continue: it may be South East Queensland’s hottest summer on record since 2008.

Vista from Point Glorious © 2014 FM DXing at WordPress

Yes, these are new photos. It is probable these are even duller than usual but it is New Year’s Day! Let’s not be too critical please! 🙂

Vista from Point Glorious © 2014 FM DXing at WordPress

On this occasion, a sedan was used on the sealed dirt road to access the lookout. This time, a German-engineered FM receiver was better suited for mountaintop reception but the fact that particular automobile was taken was more a matter of luck rather than any foresight!

Images from the four FM broadcast sites within 15 kilometres (9 mi) were not readily encountered. This includes the site pictured in the first photograph. Inter modulation and cross modulation was acutely obvious with the factory 2011 Nissan X-trail Four Wheel Drive radio used in 2012. On both occasions, a six-band shark fin antenna was used, as is typically supplied with modern vehicles with on board Global Positioning Service (GPS).

 ‘100 years of Surf Lifesaving’ exhibition for Australia Day 2007, National Museum of Australia © 2009 Hil

These are a compromised design to preserve space but frequently provide satisfactory FM reception. It helps enormously if the shark fin antenna’s inbuilt preamplifier is built to the highest contemporary standards using GaAs pHEMT Monolithic Microwave Integrated Circuits (MMICs), for example.

Golfito, Puntarenas in Costa Rica © 2009 Christian Haugen

A curtailed five-minute FM band scan performed the early afternoon revealed few surprises. Only the 100 kW public broadcasts from 425km (264 mi) from the coastal south could be heard belting in. Last time, the 80 kW public broadcasts 389 km (242 mi) north-west were audible even from the edge of Lake Cooloolabin, with coastal tropospheric enhancement playing a starring role.

Data furnished from FM Scan, the ACMA Register of Radio Communications Licences & Google Maps.

Creative Commons license - Click here for details

The three photographs of Point Glorious may be freely used for non-commercial activity provided attribution is given. Should readers choose to use those photos elsewhere, please link back to this page or attribute this blog as the copyright holder.

Related blog posts

Off road: Conondale National Park & Cooloolabin Dam

Mapleton National Park & Cooloolabin Dam

Point Glorious

FM Portable Shootout: Bauhn ADS215 versus Degen DE1121

The following post is a ‘quick and dirty’ portable receiver shootout between the Bauhn ADS215 and Degen DE1121.

The DE1121 was chosen as the contender as it is consistently the most sensitive radio this writer owns, offering outstanding performance on weak FM signals. Whether playing with FM signals on a mountain top, or in a beachside apartment or garage surrounded by steel & concrete… if a (more preferable) component tuner absolutely cannot be utilized, this portable radio shines the brightest.

Sensitivity data for the Bauhn ADS215 dual band receiver is NOT available, so a comparison test is one crude and fun way to gauge significant differences in receiver performance.

Biker Laurel in Gun Shootout © 2012 Edward Liu

Methodology

Since both radios offer FM reception, this band is to be the subject of the test. To avoid potential interference from the mains power supplies, battery power was used. The telescoping monopoles on both receivers were used. It is important to be fair and perform the test with considerable urgency. Transient propagation changes over time affect VHF/FM receiver testing. Anomalies such as jet reflected signal improvements may distort results.

Bauhn Digital Receiver

The Degen radio was tested first. The Bauhn radio was tested immediately after; perhaps five minutes had elapsed. Seven provincial FM signals were tested for 45 seconds each. The test was repeated the next day to ensure that potential propagation changes during the test had NOT affected the preliminary test.

Characteristic Bauhn ADS215 Degen DE1121
Price Sale $30 retail From $91 delivered
Availability Exclusively through ALDI stores Exclusively through online merchants
Tuner Gyro Signal 1128 (Taiwan) Toshiba TA7358AP (Japan)
FM Sensitivity N/A Better than 5 microvolts for a signal with 30 dB S/N at 98 MHz
IF and Selectivity Stock: Digital Processing of analogue IF Custom modified: 180 kHz + 56 kHz Murata filters
Origin China by Tempo Australia China by same parent as Tecsun
Coverage DAB: 174 – 240 MHz, FM: 87.5 – 108 MHz, Radio Data System, 50 kHz steps, RDS: PT, PS, RT & PI data Longwave:  50 kHz – 521 kHz, Medium wave: 522 – 1719 kHz, Shortwave: 1700 kHz – 30 MHz, FM: 70 – 108 MHz, 10 kHz steps
Telescopic Antenna 80 cm Stainless Steel 90 cm Stainless Steel
Batteries 4 x AA 3 x AA
DC Supply 5 volts, 600 mA 6 volts, 300 mA
Inputs Headphones Headphones, Auxiliary Audio, External FM Antenna
Speakers Single, 1 watt Single, 77 mm diameter

Comparisons with other DAB+ receivers

Surprisingly, the Bauhn receiver offers superior sensitivity on the FM band than the far more expensive Pure One Mini and Bush BR10DAB. The latter contains Frontier Silicon’s Venice 5.1 module, which was released in the third quarter of 2008. That module was also included in the Yamaha TSX-120 Ipod dock and many other receivers. At that time, Frontier Silicon manufactured 80% of the chipsets, modules & platforms for over 300 DAB receivers.

Commerce & economics graduates are taught that purchase price is a guide to what the market will bear, NOT necessarily quality. That is certainly applicable for this product!

Notable features of the Bauhn receiver


Unlike the latter two receivers, internally generated spurious interference was absent on the FM band on the Bauhn DAB+ receiver. By accident, this tester discovered that the Bauhn ADS215 will in fact decode PI codes, making it advantageous for long distance FM (DX) enthusiasts as PI codes. DX enthusiasts use these unique station identification codes since this parcel of RDS data will decode most readily.

Accessing PI code data seems to be a hidden feature (aka Easter Egg) of the receiver. Certainly, there is no mention of such capability in the instruction booklet. To access the PI code mode, simply hold down the INFO button for about five seconds or longer. This is the radio’s software menu. Continue to press the INFO button until the current FM station’s PI code is displayed. Once PI code mode is activated, tuning in 50 kHz increments can be performed as per usual.

De1121 © 2013 FMdxing

Weak Signal in MHz Distance in Miles Bauhn ADS215 Degen DE1121
89.1  86  (15 kilowatt ERP) No signal Mono
91.5  88  (1 kilowatt ERP) No signal Negligible signal
92.5  45 Mono Stereo
96.1  85 Poor signal Stereo
100.9  143 Indoor interference Mono
102.9  45 Negligible signal Mono
107.3  90 Mono Quieting Stereo

Bauhn Digital Receiver

Sensitivity

The sensitivity results compiled in table two (above) suggests that unsurprisingly, a dedicated FM radio (as usual) will outperform a DAB+ radio. Similarly, high-end DAB+ component tuners do NOT take advantage of the compromised FM section of the DAB+ modules, but employ a dedicated FM tuner module for optimal reception.

Brief word on DAB+ 

This mode was NOT tested thoroughly on this occasion, since this receiving location suffers no coverage deficiency. However, the Bauhn ADS215 is an extremely capable performer on DAB+. These transmissions are the primary choice for digital radio broadcasts outside of the Americas, which uses IBOC (In Band On Channel).

Digital radio mode on Bauhn ADS-215 © 2014 FMdxing

Many forum correspondents report the Bauhn ADS215 to be the most sensitive DAB+ receiver they own.  British hi-fi manufacturer AudioLab uses the same DAB+ module as this radio in their high sonically rated 8200T component tuner, according to the service manual.

DAB+ versus FM

The penetration of DAB+ continues in Australia and is expected to reach 16 percent of households by June 2014, according to PwC estimates. With new spectrum allocated to DAB+ in regional areas (now that analogue high band VHF television has been switched off), the future of digital radio broadcasting offers great potential across the continent.

Anecdotal reports suggest DAB+ programming in this country may have improved. At the very least, the discussion of DAB+ station content seems to be flourishing like never before! Unfortunately, the use of low bitrates to broadcast specialist music stations may continue to be problematic for those listening on component tuners within hi-fi installations.

Degen De1121 interior © 2013 nice.kaze.com

Summary

The FM performance of DAB+ modules seems to be improving each year. The FM performance of a DAB+/FM combination radio might still NOT meet the onerous portable demands of long distance FM enthusiasts. Earlier articles listed below focus heavily on that very topic, and attempt to explain why some of these individuals may prefer custom modified portable FM radios such as the Degen DE1121.

The test results indicate that the Bauhn ADS215 is likely to provide satisfactory FM performance. Ideally this radio is suited to those listeners who suffer from patchy DAB+ reception, which means the fallback radio entertainment becomes analogue FM broadcasts.

Further reading

AudioLab Component tuner

AudioLab Component tuner Review – Adobe Reader document

Bauhn ADS215 discussion on Whirlpool forums

DAB chips to be in smartphones

DAB radio’s reception gaps proved to be a matter of life or death – Telegraph (UK)

Degen DE1121 detailed specifications – German export version

Degen DE1121 user reviews – Translated Russian

DE1121 Block Diagram – Adobe Reader document

GyroSignal Technology DAB+  tuner modules

Indicative sales prices for DAB+ radios

Kaito KA1121 detailed specifications – North American version

Toshiba TA7358AP FM front end – Adobe Reader document

Related blog articles 

Bauhn ADS215 satirical shootout

Inject your DAB+ portable radio with steriods

Portable FM radios favoured worldwide – Digital Signal Processing versus a Conventional IF section

Receiving Sporadic E reception with portable receivers

Survey of portable receivers used by European enthusiasts

What if analogue FM radio ended in the United States?

‘Tis the season for beer (Part 2)

This is now what the finished product looks like:

Home Brewed Cascade Imperial Voyage Pale Ale © 2013 FM DXing at WordPress

Home Brewed Cascade Imperial Voyage Pale Ale © 2013 FM DXing at WordPress

Home Brewed Cascade Imperial Voyage Pale Ale © 2013 FM DXing at WordPress

Along with brewing, the publication of radio articles on this blog will resume over summer without interruption. Three articles will be published which loosely focus on surviving long distance FM reception without an external antenna. It is a situation many enthusiasts find themselves in from time to time, especially during the summer vacation period.

Forthcoming radio articles include:

  • Simple DAB+ FM portable receiver shootout;
  • Easy improvements to portable FM receiver antenna performance &
  • FM DXing without an external yagi antenna.

Christmas & New Year wishes to all readers. The Festive Season can be a stressful time of the year, but let’s hope everyone can slip in some relaxation. ‘Tis the season for beer, after all! Try not to fight too much with family & friends! 🙂

‘Tis the season for beer (Part 1)

This blogger first started brewing beer in 1998. Due to other commitments, the hobby was unintentionally discontinued after 2005. Perhaps priorities changed?

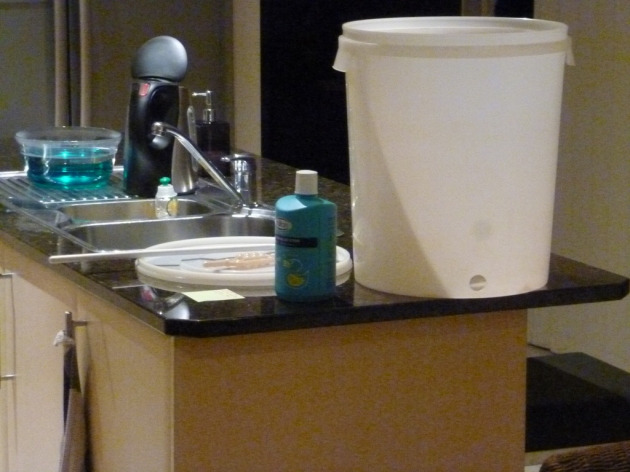
Sterilization phase © 2013 FM DXing at WordPress

Nothing messes up a tidy kitchen faster than brewing, especially when using vintage equipment designed back in glorious 1990s!

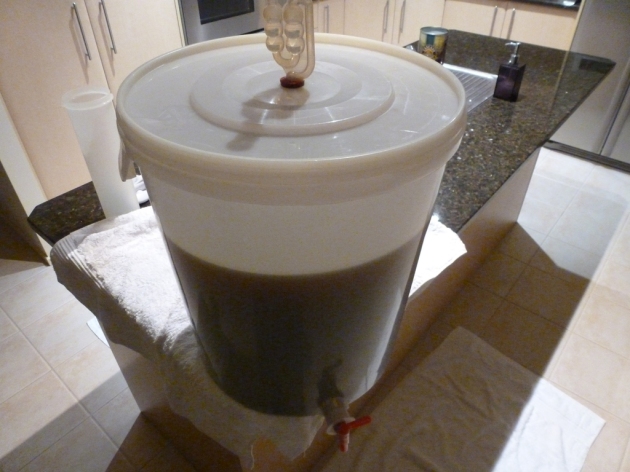
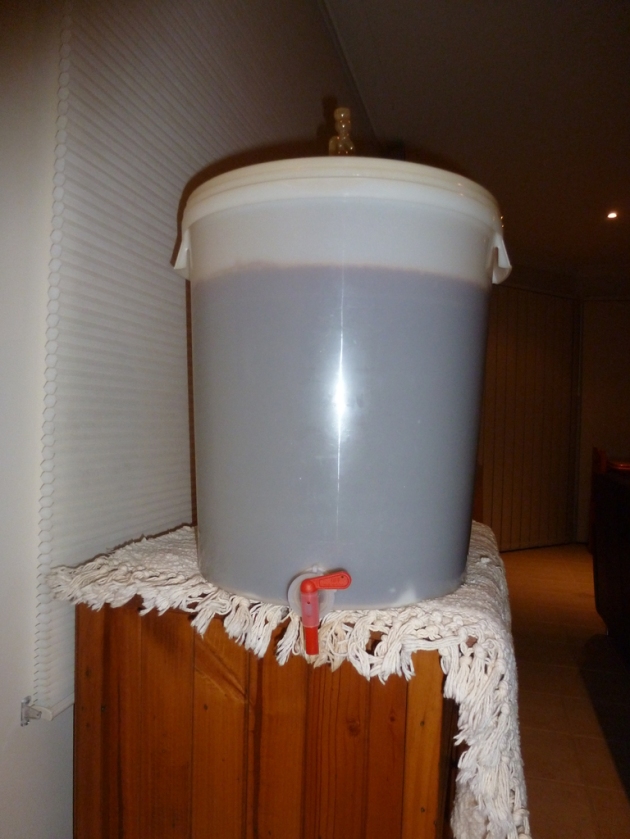
Wort phase © 2013 FM DXing at WordPress

The first brew to contemplate ‘back on the trail’ needed to be as simple as possible.

Wort phase © 2013 FM DXing at WordPress

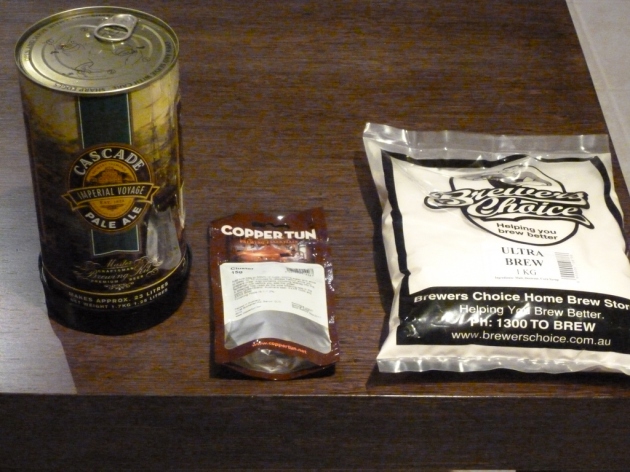
Compared to previous brews, relatively inexpensive commercial ingredients were chosen, for example… no heating of grain on the stove. Nothing hard core or even remotely ‘expert’ was to be attempted on this occasion. After an extended absence, it was more important to try and re-acquaint oneself with the fundamental techniques of temperature control and sterilization. Minimizing equipment failure is also a factor at this point due to the age of the kit.

Keeping this brew simple © 2013 FM DXing at WordPress

Pale Ale recipe

1.7 kilograms Cascade Imperial Voyage Pale Ale
1 kilogram Ultra Brew fermentable sugars
15 grams Cluster Hop Pellets (steeped for 20 minutes)
1 packet Dry Yeast (supplied with can of concentrate)
3 litres freezer-chilled Spring Water (to cool wort before adding yeast)
Tap Water

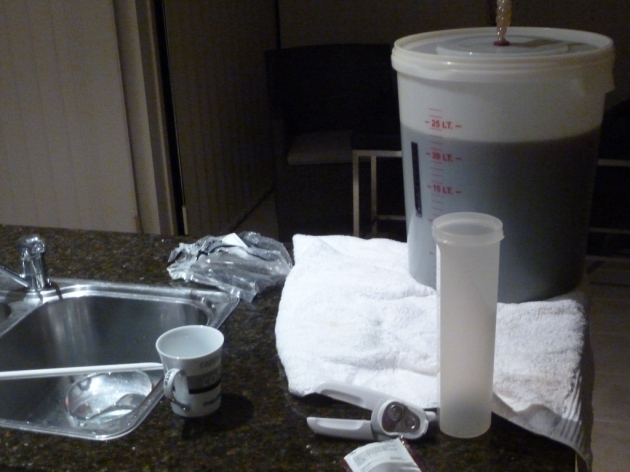
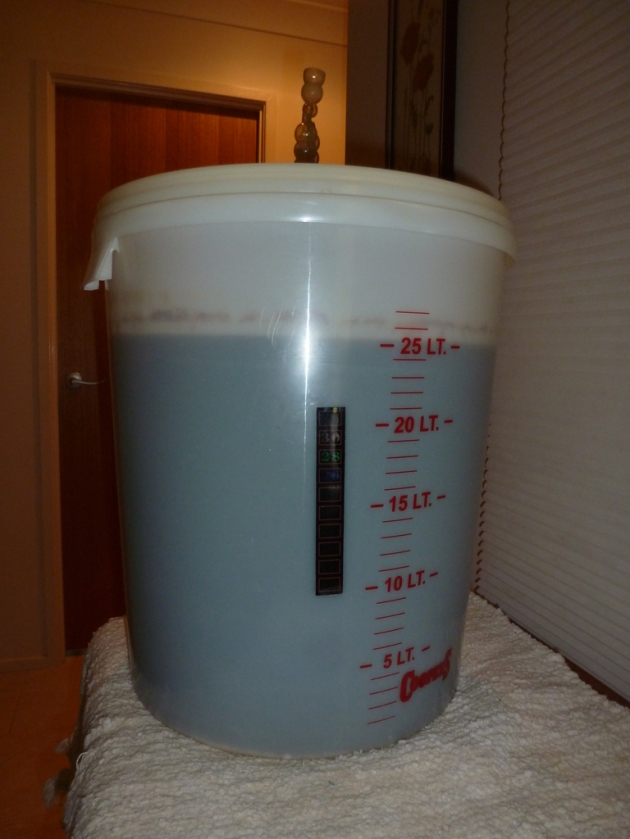
Fermentation phase © 2013 FM DXing at WordPress

Key measurements 

Alcohol by volume 3.6 percent
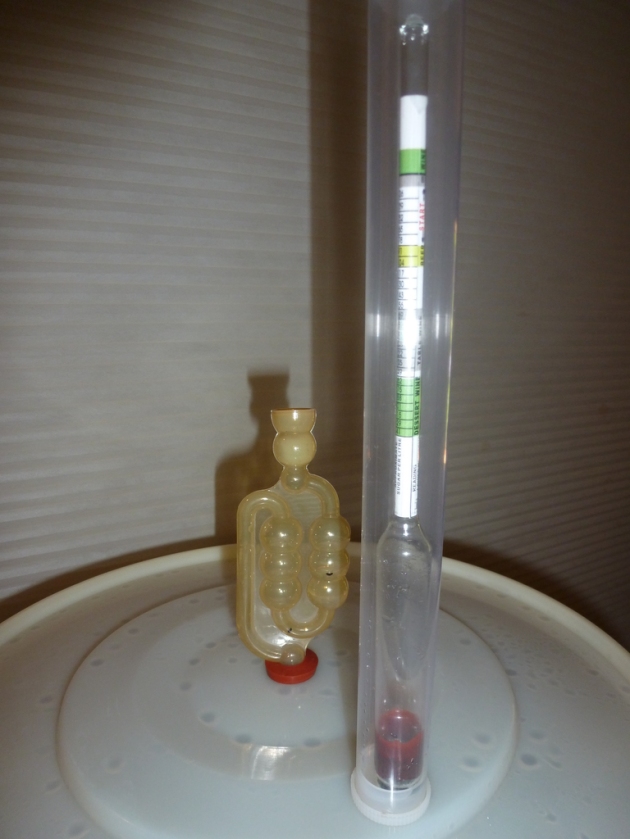
Original gravity 1.040
Final gravity 1.012
Apparent attenuation 70 percent

Fermentation was complete after five days. The final gravity measurement taken with the hydrometer at this point remained unchanged for the next 48 hours. Bottling took place after seven days in the fermenter.

Fermentation phase © 2013 FM DXing at WordPress

Temperature chart

DATE DAY MINIMUM MAXIMUM
22 Friday 19.5 27.1
23 Saturday 21.9 28.1
24 Sunday 20.0 29.2
25 Monday 20.5 27.0
26 Tuesday 20.0 25.9
27 Wednesday 15.9 25.5
28 Thursday 17.1 26.6
29 Friday 18.6 29.3

Unfortunately, the beer sat in the fermenter at summer temperatures (maximum average 27 °C or 80 °F) a day longer than necessary. This was unavoidable as the bottling process takes two and a half hours in the cool of the evening. The exterior of the fermenter was cooled with ice during the final day prior to bottling. The cooling arrangements were implemented the night before, since the temperature forecast suggested the last day was to be the hottest of the month.

The bubbling had subsided after day five when the first hydrometer measurements were taken. On the final day (seven), the airlock continued to bubble (at most) every half an hour. The notoriously unreliable airlock should never be relied upon as an indicator exclusively!

Hydrometer monitoring phase © 2013 FM DXing at WordPress

The chilled, uncarbonated, unsweetened beer exhibits a dark maroon colour. Tasting suggests a slight resemblance to Newcastle Brown Ale. No strong ester characteristics were detected. Should it be left in the fermenter too long during high temperatures, beer may taste like ‘fuel’ or exhibit a solvent flavour prior to bottling. These harsh tones may dominate and ruin the flavour of the beer, even after aging.

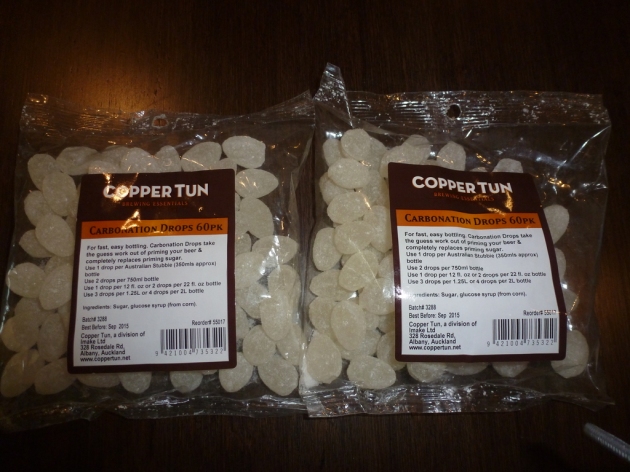
Bottle priming phase © 2013 FM DXing at WordPress

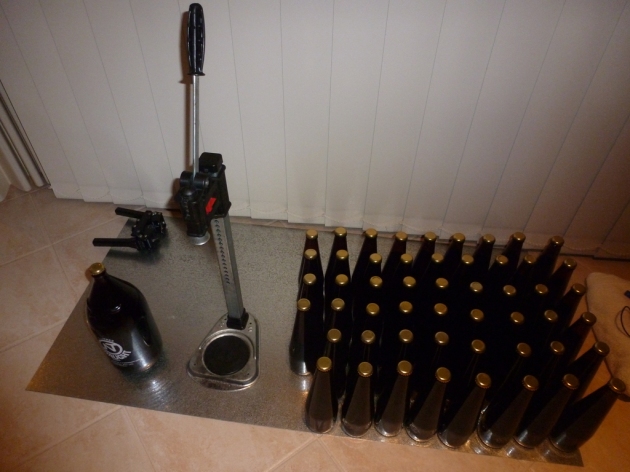
During the bottling phase, commercial carbonation drops and a two litre Darwin stubby were used to save time. Priming 60-odd 375 ML bottles is old fashioned, but old habits die hard! 🙂

Bottle priming phase © 2013 FM DXing at WordPress

Why was an ale chosen?

According to Frey, Scheetz & Sheidy:

Ale is beer that is brewed using only top-fermenting yeasts, and is typically fermented at higher temperatures than lager beer (15 – 23 °C, 60 – 75 °F). At these temperatures, ale yeasts produce significant amounts of esters and other secondary flavours and aromas, oftentimes resembling those of apple, pear, pineapple, grass, hay, banana, plum or prune.

Daniel Stromwall, Andrea Lin & Chrissta Maracle offer further enlightenment:

If the wort brews at a higher temperature 10 – 2 (50 – 77 °F) using an ale fermenting yeast, the fermentation process will favor the production of esters and diacetyl compounds. The result is a beer that is fruitier and more robust in flavor while having higher sugar content and lower ethanol content than lagers.

Exhausted but completed © 2013 FM DXing at WordPress

In a nutshell, it is more difficult for high temperatures to ruin an ale when undertaking a potentially challenging summer brewing schedule. Bottle conditioning of this ale now requires at least four weeks in a cool dark place. The ale will be ready in time for Christmas, with additional aging to potentially improve the taste of the beer by the New Year.

Temperature data sourced from Bureau observations during the seven day brewing period, 22-29 November 2013. Thank you to all those kind folk, including master capper Fat Crap who shared the hard work!