Quest for silence: Quiet SATA notebook hard drives

When using a notebook computer for audio applications, unfortunately it isn’t simply a matter of buying the most reliable big hard drive. Using a notebook with either a Software Defined Radio (SDR) or as a playback device when recording from external components (such as a tuner) means noise matters. Hard drives produce noise which affects concentration in critical listening applications where the signal to noise ratios are critical… especially with ‘compromised audio’, which is often characteristic of weak radio signals or old recordings.

Noise Factory © 2010 Alexander Marco

Noise Factory © 2010 Alexander Marco

Hard drive evolution

The differences in hard drive technology are often quite obvious. Even within the last 15 years, the average person can readily compare old 3.5″ IDE hard drives to modern ones and notice the mammoth difference in audible noise, even with the software inactive (idle mode). More recently, there is often a noticeable difference between SATA drives with their increasingly rare IDE counterparts.

A decade ago, New York inventor Neil Singer suggested:

The level of noise in a disk drive is due to vibrations at particular frequencies, such as 6.6 KHz, 6.0 KHz, 5.0 KHz, 4.2 KHz, and 1.3 KHz. On the other hand, mechanical vibrations, which reduce seek time, result from vibrations at different frequencies, such as 3.3 KHz.

Today, Solid State Drives (SSDs) are generally considered to be ‘silent’ storage technologies. Problem solved, right? Perhaps, provided one has inordinate wealth! The cost associated with buying a huge SSD means these aren’t necessarily cost effective choices for radio DX applications where uncompressed audio demands may be onerous; a 6.14 MHz ‘spectrum chunk’ may consume as much as 120 GB of data per hour.

Research aids

For specific needs, the Silent PC Review (SPCR) test articles and forums are an invaluable, simple to understand resource in the quest for finding quiet hard drives, whether external, internal, desktop or laptop variants. Further, hard drive manufacturer Western Digital (whose part reliability is top notch) provides acoustic specifications in dBA on their website. Other manufacturers such as Hitachi & Seagate may also provide this data.

Much of this information (sadly, including this article!!!) becomes redundant quickly after publication. Before committing to recommended drives, it is prudent to check with manufacturers that there are not better performers that may have just been released.

Eventually the cost of SSD technology may become so affordable that it is foreseeable that there will be negligible demand for acoustic tests on the subject matter of this article. The reality is that SATA drives are older, less efficient performing drives but for now, remain perfectly appropriate choices. Drew Riley of Tom’s Hardware portal suggests:

Even though SSDs only account for 10% of the total market, growth over the next few years is expected to be explosive.

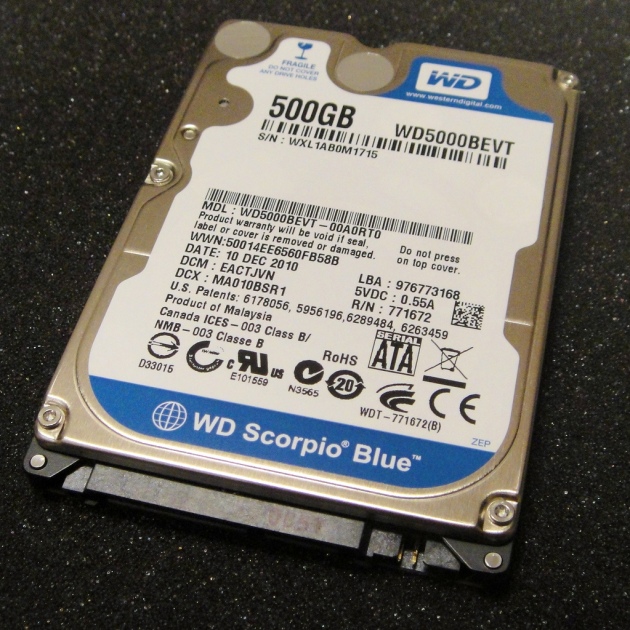
WD 2.5" SATA drive © 2011 Matt Kieffer

WD 2.5″ SATA drive © 2011 Matt Kieffer

Needs analysis

This blogger wanted to buy a 2 TB hard drive for a new notebook which is already furnished with a single 1TB (5400 rpm) drive, which incorporates a second bay for a secondary hard drive. SSD drives were not considered due to cost; a typical 1 TB drive costs over $600 and over half that for 0.5 TB. Although fast, external USB 3.0 drives were also not considered due to already congested desk space. Hell, there’s enough crap lying around!

Whilst affordable, those desirable 2TB SATA drives are typically considerably noisier than their smaller capacity counterparts. So significant was the increase in noise (based on the dBA specifications) this prompted a reassessment as to whether bigger was necessarily critical for the particular SDR application. If the noise is problematic, even if there are two internal bays, it’s not so easy to switch internal drives off unlike an external drive. Therefore it’s probably worthwhile to research the most appropriate internal drive, rather than be forced to tolerate a noisy drive by judicious use of headphones or a proportionate increase in playback volume!

Three top candidates

Priced from $45 including domestic shipping:
Western Digital Scorpio Blue 0.5 TB with SATA 6 Gb/s interface (WD5000LPVX)
Manufacturer specifications (dBA): idle 17, average seek 22.

Priced from $62 including international shipping:
Western Digital Scorpio Blue 0.5 TB with SATA 3 Gb/s interface (WD5000LPVT)
Manufacturer specifications (dBA): idle 17, average seek 22.
This drive won the Editor’s Choice at SPCR.

Priced from $125 including domestic shipping:
Western Digital Blue 1 TB (WD10SPCX)
Manufacturer specifications (dBA): idle 20, average seek 21.

One of the quietest 0.5 GB drives, the WD5000MPCK (idle: 15, seek: 17) was unfortunately no longer readily available. Obviously, when reading the dBA specification, lower is quieter. To convert between acoustic units please use the calculator below. It seems that manufacturer Seagate for example, cites noise measurements using bel units rather than dBA.


Further reading

Acoustic unit calculator

Advanced PC silencing

Benefits of Solid State Drives

Eight different 2TB hard drives, with dBA measurements

Home Studio construction

Silent Windows laptops?

Things you can do to have older laptops quiet again

Top 5 external A/V-rated drives for audio recording

World’s quietest (desktop) computer

Dusting off old tech: Setting a daily unattended FM recording

Listeners may have a need for daily recordings of certain desirable FM broadcasts such as music programmes or sporting event calls. The use of online streaming to time shift broadcasts may offer an easy solution, but problems still exist:

  • Potential loss of audio quality, due to artifacts (audio distortion) associated with low bitrate streams
  • Anxiety over burning through the monthly internet data allowance, or the
  • Ever-increasing prevalence of ‘geoblocking’ due to music licensing restrictions.

Perhaps the radio recording app doesn’t permit recording of distant FM stations on the smart phone?

Radio Concierto "Concierto Enfoque" © 2005 Leo Prieto

Radio Concierto “Concierto Enfoque” © 2005 Leo Prieto

Enthusiasts who pursue long distance FM reception may need to monitor a specific vacant frequency every day to check the presence of signals propagated via Sporadic E or tropospheric ducting, especially during summer. This technique is often referred to as recording DX audio.

The ultimate solution to their specialist needs is to purchase a Software Defined Radio (SDR). An SDR probably represents the most efficient way to participate in long distance FM reception, without the often exhausting and time consuming burden of ‘live listening’ when propagation conditions happen to be favourable.

But many FM enthusiasts cannot justify the outlay of approximately $1,400 on a Micro Telecom Perseus Software Defined Receiver (SDR) with an FMplus down converter. And when one takes into account the minimum hardware requirements, their fellow Italian counterparts including the Elad FDM-S1/PDC-FM combination or FDM-S2 are not much cheaper either.

Recording FM broadcasts… on the smell of an oily rag!

By using simple but effective old technology, setting a daily unattended FM recording remains easily within reach for everybody.

There are likely to be numerous ways of achieving this, using an old computer. To implement this blogger’s preferred method, the following equipment is required:

  • Microsoft Windows XP operating system (or above)
  • Leadtek Winfast TV2000XP FM tuner card (or equivalent)
  • Rooftop FM/VHF/UHF antenna connection with ferrite chokes clipped onto cables.

The following equipment (as used in the final step) is desirable:

  • Desktop computer with a Bios that supports Auto Switch On.

The Leadtek Winfast TV2000XP is a sensitive FM tuner card which is readily available for $5 – $15 on the second hand market. The card has software available for Windows 7, Vista, XP and 2000. For simplicity, XP will be used in this guide since the TV2000XP software was optimized for this operating system.

Flexibility

Although the three mandatory steps below might initially look daunting, the beauty of this technique is that performing these steps is generally only required once. Furthermore, the technique is not restricted to unattended software recording tasks. To fully automate another task (such as a virus & malware scan) replace this task into steps one and two.

Old desktop computers © 2009 Brian Landis

Old desktop computers © 2009 Brian Landis

Virtually any old desktop PC (manufactured after 2002) should be a candidate for such ‘old school’ simplicity. It’s perhaps an opportune time to dust off disused Windows XP computers which may not be cost effectively upgraded to Windows 8 operating system after Microsoft’s cessation of support.

FIRST STEP – Setup Winfast FM in Windows Startup

A
Click on START
Search hard drive for WFFM.exe
Note which directory this application file resides in, for example: E:\Program Files\WinFast

B
Click on START
Search hard drive for Startup
In the list of results, there will be Startup next to a folder named something like:
E:\Documents and Settings\joebloggs\Start Menu\Programs
Click on Startup and leave window open.

C
Click on START
Click on RUN
Type in E:\Program Files\WinFast (or whatever directory it is, obtained from step A)
Locate WFFM.exe
Right click CREATE SHORTCUT
Drag the newly created shortcut into the Startup folder left open from step B.

Restart the computer. Please ensure Winfast FM starts up automatically.

Hint: Tuber Guru Fuel has made a video if the author’s approach (above) looks too boring to even contemplate!

SECOND STEP – Setup the timer in Winfast FM

The desired channel, number of hours and recording quality must be chosen in this step. Specific days may be chosen. For example, every Monday between 7-10 pm, Monday night football may be recorded.

WinFast Daily Recording Schedule © 2014 FM DXing

WinFast Daily Recording Schedule © 2014 FM DXing

Obviously, please ensure that the chosen frequencies (radio stations or vacant channels) to be recorded have been added in. To do this, click on CONFIGURATION button in Winfast FM and navigate to the CHANNEL LIST on the top centre.

Ensure antenna is connected and enter the schedule as follows:

Click on CONFIGURATION button in Winfast FM
Click on SCHEDULE button on the top right

Click on ADD at the bottom left
Under ACTION select RADIO RECORD
Under CHANNEL pick the frequency
Under FORMAT choose a PCM or a compressed format if disk space is tight

Under DAILY tick the applicable days
Under FROM select the Start Time
Under TO select the End Time

Double check details and select OK. Please take note of End Time and Start Time chosen.

WinFast Daily Recording Schedule © 2014 FM DXing

WinFast Daily Recording Schedule © 2014 FM DXing

For additional information on setting an FM recording schedule please click on the ? button within the software.

Ideally run a test scheduled recording consisting of a few minutes duration. Once complete, please check the contents of the recorded file to ensure it contains the desired broadcast.

THIRD STEP – Setup shutdown in Windows Scheduled Tasks

The aim is to ensure the computer switches off after recording. Blogger the Spinning Donut has a step-by-step guide and video for guidance.

Windows Daily Shutdown Schedule © 2014 FM DXing

Windows Daily Shutdown Schedule © 2014 FM DXing

Ideally run a test scheduled shutdown for a few minutes into the future. Once the system is shut off, please restart it.

When setting the time for daily shutdown, please use the End Time specified in step two, but add an additional 5 minutes. For example, if the End Time of the radio recording in Winfast FM Schedule is 11:30 please ensure the Windows shutdown is set for 11:35.

This allowance will ensure that the end of the recording is written to the hard drive, meaning that a valid sound file will consequently be playable with all audio software.

Hint: Third party software that will schedule a daily Windows shut down may be used as an alternative.

FOURTH STEP – Setup daily startup in BIOS 

The aim is to ensure the computer switches on before recording, an optional but desirable process.

A PC World Wiki contains a step-by-step guide to Wake System settings with screen shots.

When performing this final (and the simplest) step, please take note of the Time and Date configured in the Bios. Ensure that the WAKE UP TIME / RTC ALARM TIME selected in the Bios is before the Start Time chosen in Step two. For example, if one sets the system to wake 10 minutes prior to the recording Start Time set in the FM recording scheduler, this ‘factors-in’ the starting up delay of Windows.

These screen shots show the settings to configure the computer to wake at 0730 hours every morning. Each Bios may be slightly different, if in doubt please refer to the printed instructions supplied with the motherboard.

BIOS Daily Wakeup Schedule © 2014 FM DXing

BIOS Daily Wakeup Schedule © 2014 FM DXing

If Daily is not listed in the Bios facility, ensure the WAKE UP DATE / RTC ALARM DATE is to be set to 0 for daily system wakes. Whilst it is very simple, as always a trial run is recommended to ensure familiarity with the date and time format. Finally, don’t forget to save WAKE SYSTEM / RTC ALARM settings to CMOS when exiting the Bios facility! With this Bios, F10 does the trick.

BIOS Daily Wakeup Schedule © 2014 FM DXing

BIOS Daily Wakeup Schedule © 2014 FM DXing

Hint: Obviously when there is no longer any ongoing requirement to automatically start the PC for daily recording etc. it may be convenient to DISABLE the above WAKE SYSTEM / RTC ALARM settings!

Practical considerations

Some computer Bios facilities may not offer a Wake or Alarm System setting where the computer will switch on without intervention, as described in step four. Nonetheless, under those circumstances one can still follow the instructions to schedule recordings to commence and then shutdown, as listed in steps one to three above. Of course, one must be home to physically start the computer or already be using the computer for other tasks. For this reason, the provision for WAKE SYSTEM FROM S5 or similar Auto On facility in the Bios is considered a prerequisite for implementing a fully unattended recording system as proposed in this guide.

Windows Password & Login Settings © 2014 FM DXing

Windows Password & Login Settings © 2014 FM DXing

Step four will not work if the User Accounts in Windows XP (above) are set to require users to enter passwords & / or press Control-Alt-Delete as a security measure on Windows startup to operate software. These logins require user intervention, which is incompatible with the goal of unattended recording. These Windows logins are easily disabled (reference video). Moreover, password protected logins are overkill for old desktop computers that are not connected to the internet, but dedicated to the task of recording!

Alternative Power Management features such as reduced power Hiberation or Standy By modes are beyond the scope of this guide. The method above allows for maximum power saving. Since the computer system is only operational when required, there is also no potentially annoying fan and hard drive mechanism noise; older desktops can indeed be noisy.

Once it has been established that settings are configured properly during a test run, daily recording settings can be implemented. Enjoy the automation and the maintenance of old tech!

Testing: the method has been tested numerous times with several disused single-core CPU (3 GHz) computers using ASRock K7VT6 & Asus P5GZ-MX motherboards. These of course, feature a Bios that supports Auto Switch On. 

Butchering the Winfast TV2000XP for FM DX

Please consider the risks involved with modifying a tuner before proceeding with any project. The author shall not be liable for any loss or damage whatsoever (including human or computer error, negligent or otherwise, or incidental or consequential loss or damage) arising out of, or in connection with any use or reliance on these instructions.

The Leadtek Winfast TV2000XP is a Peripheral Component Interconnect (PCI) card to receive FM and analogue television broadcasts. The card also provides analogue video capture functionality via an S-video input. At the heart of the card is the Philips FM1216 / PH hm tuner. The module may be used in a number of other manufacturers’ analogue TV and FM cards, including:

  • Hauppauge WinTV FM;
  • AverMedia AverTV Stereo Edition Desktop TV Personal Video Recorder &
  • Conexant Fusion 878A Easy TV.

The tuner includes the following Philips’ integrated circuits:

  • TDA5736;
  • TSA5523;
  • TDA9809 &
  • TDA7040.

Since analogue television is ‘done and dusted’ these cards (below) may be classified as redundant technology. Accordingly, most sell for less than 10 bucks on Ebay!

Card featuring Philips FM1216 tuner © 2007 Whazilla

The card may be used with Dscaler noise reduction software for weak signal detection, such as low VHF band Sporadic E in regions where analogue television is still operational. Because of the wide frequency coverage, Klaus Hirschelmann suggests the tuner offers potential to receive International Radio and Television Organisation (OIRT) broadcasts still on-air in Eastern Europe.

Live recording with TV2000XP

According to Philips:

The tuner [Automatic Gain Control] AGC for both TV and FM radio operation is generated with a novel AGC detector which measures the [Intermediate Frequency] IF signal level directly at the tuner IF output pins. As opposed to the conventional AGC detector, this new circuit allows a higher take-over level and offers superior immunity against tuner overload.

The tuner offers satisfactory strong signal immunity. Performance is markedly better than the E4000, R820T or FC0013 tuners used in a Realtek Software Defined Receiver (SDR) or a Silicon Laboratories’ Si4734 based portable receiver connected to the same rooftop antenna. Philips’ tuner typically features an Image Rejection of 65 decibels for the FM band. In terms of benchmarking, a Yamaha TX-930/950 component tuner features a more favourable 90 decibels. AM Suppression – the ability of the tuner to reject AM signals, is specified at 38 decibels.

Whilst the tuner features interference suppression, the separation of FM stations is not up to contemporary requirements. When Philips Components designed the tuner, Digital Signal Processing (DSP) was at its infancy. These days, DSP based tuners are perhaps taken for granted. Whilst away interstate recently, this blogger noticed that even a cheap TDK Ipod dock supplied in the apartment featured a DSP FM tuner!

Timer Radio Recording with TV2000XP

The scheduled timer recording functions for recording (above) on the TV2000XP is a boon. Therefore, it is a shame that the tuner is not suited to a congested FM dial. When it was used for television recording, the software accompanying this product worked flawlessly.

The tuner does not permit a listener to separate fringe stations 100 kHz apart, and to hear several stations without interference from strong local stations, it was necessary to off-tune 50 kHz to prevent audible interference. Fortunately, sensitivity seemed fine, for example daily reception (a 26 kW broadcast) out to 208 miles (335 km) was possible with a modest combination rooftop antenna without a preamplifier. Sensitivity for a weak signal with a 26 dB signal to noise ratio is 2.24 uV, compared to a Yamaha TX-930 with a more favourable 0.8 uV. Most tuner software (including Leadtek and Hauppauge) features a five segment signal strength meter.

After quite a few drinks one night the author decided that it would not hurt to rip the tuner module open and see what was inside! It was no risk, because a replacement card is dirt cheap. Worst case scenario, if secondhand supplies dissipate, one can simply solder in a new tuner module, pictured below.

FM1216 tuner module © 2013 Max's Depot

The fact the aluminium lid of the Philips FM1216 / PH hm tuner module could be easily plied open was a surprise. What was inside was even more interesting. Staring up at this ‘butcher’ were two 230 kHz Murata ceramic filters and one ceramic discriminator. The block diagram (below) shows the role of the two 10.7 MHz IF filters.

Block Diagram of FM1216 © 2013 Philips Components

To aid easy identification of components (in this case, the existing filters), it is recommended to refer to an online source such as Bruce Carter’s Ceramic Filter page.

Was this ‘elderly beast’ a candidate for a filter butchering? Hell yeah! Hence this article is basically another instalment of the ‘narrow filter modification’ project. It never gets old. 🙂

TV2000XP inside tuner module

Because the rear of the tuner module cannot be easily accessed, the existing wide filters are perhaps best removed from the enclosure… by force! Pliers were – again – used to ‘throttle and crumble’ the existing filters, easily identifiable by the Murata logo. The replacements are soldered in place of the old ones.

The tuner module features a large Printed Circuit Board (PCB) as illustrated on the left half of the photograph above. Even ‘old eyes’ are unlikely to encounter problems with such a simple project. This is a five minute project requiring little equipment, consisting of:

  • general purpose pliers;
  • a soldering iron;
  • solder;
  • desolder braid (optional);
  • philips head screwdriver (optional) &
  • replacement 10.7 MHz filters of one’s choice.

Mike Bugaj is another enthusiast who enjoys ‘butchering’ FM tuners as much as this blogger! He prefers to change one filter first and test performance before proceeding with replacing the other wider filters. This blogger takes the same approach. One of the two 230 kHz filters was removed and a 80 kHz filter soldered in its place. The butchering is not pretty (below), in fact it is possibly one of the ugliest mods ever performed… ‘but she works!’ Stations 100 kHz apart can now be heard, whilst the distortion levels of FM broadcasts remain satisfactory.

80 kHz filter replacement pictured lying flat, E10.7T - FM1216 module

Whilst not mandatory, a preamplifier improves sensitivity. As mentioned above, the module may not be up to component tuner standards for weak monophonic or quieting stereo signals.

Ferrite suppression chokes for RG6Q coaxial cable - TV2000XP card in far rear expansion slot

For the finishing touch, it is recommended to purchase a few ferrite suppression chokes to clip onto the coaxial cable (above) to minimize Electro Magnetic Interference (EMI) problems from a desktop PC. The blogger can recommend jteam Electronic Components. Their chokes (below) were posted quickly from Perth, Western Australia and were very inexpensive compared to retail supplies.

Ferrite suppression chokes for RG6Q coaxial cable

To minimize interference from the desktop PC, so as to maximize FM tuner sensitivity:

  • A CRT computer monitor should NOT be used;
  • Internet routers should be switched off;
  • Remove all unnecessary or unused leads connected to the desktop computer such as USB extension cables &
  • Use RG-6 Quad Shield Coaxial Cable for all connections from the tuner to the antenna wall plate.

A recommended source for replacement 110 kHz narrow ceramic filters is Greg Gortman of Lexington, Kentucky. International carriage is available from these sources. Prior to publication stocks were available.

Programme details in RDS Spy © 2013 Jan Kolar, Czech Republic

Klaus Hirschelmann notes that the tuner module features an Multiplex Output for RDS use. Whilst this blogger has not tried it yet (perhaps after the Ashes test cricket series) the Data and Clock signals (found on pins 13 & 14) can be fed via a shielded cable to the Line Level Input on a sound card. In theory, this should enable RDS decodes with RDS Spy software, illustrated above and below.

Sound card input in RDS Spy © 2013 Jan Kolar, Czech Republic

For those craving more experimentation, H. Chew suggests the Philips tuner can also be used as an SDR under a Linux operating system. Polish enthusiasts have even built the module into a ‘stand alone’ RDS component tuner!

Specifications quoted above may not necessarily be indicative of performance. There is nothing preventing manufacturers from using different test signals to make measurements in an effort to improve performance specifications for marketing purposes.